
Door Handle Replacement
It's worth replacing door handles if you aren't happy with the way they appear, or if they are difficult to use. With door handle repair , you can put in an entirely new handle in a short time.
Modern door handles are often equipped with cover plates that conceal the screws, giving them a more attractive appearance. However, you will need to attach them separately if your new handle doesn't have them attached already.
Remove the handle that was previously used
The door handle isn't just a decorative feature for your home, but it's also a safety feature that allows you to lock and unlock the door. But, over time the door handle could lose its grip, appear loose or start to look old and worn. This is an indication that it's time for a replacement.
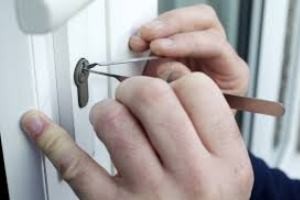
One of the first signs that your door handle requires replacing is if it's becoming difficult to operate. This is a problem since it means that you are unable to not lock or unlock your door, which could create the risk of security for you and your family.
It's also a good idea to replace the handle on your door if it is damaged or broken. A damaged or broken door handle is risky, particularly for elderly and children members who may struggle to open it. They could be trapped. Luckily, it's quite simple to fix a damaged door handle by replacing the handle that was broken.
Modern door handles are usually standard sizes and should be able to fit any door. If you're unsure if your new door handle will fit, try taking out the old one and measuring the holes in its housing. This will allow you to buy the right door handle.
The easiest way to remove the handle from your door is to unscrew it from the door itself. Usually you'll need a screwdriver. Some door handles come with a cover plate which hides the screws used to mount them. You will need to remove this to get to the screws. After you have removed the old handle, make a note of how the spindle has been connected. This will help you align the new handle.
You can also remove the door handle by removing the latch mechanism. This is typically done with a screwdriver but you'll need to locate the small latch, which should be at the edge of the trim piece. After you have removed the latch, you can remove the handle from the strike plate, and then remove the latch away from the door's edge.
Removal of the Strike Plate
You'll need to replace your latch plate when you replace the handle. It's the part that holds the hole through which the latch for the door is inserted when the door is closed. The package the new handles come in will include two different latch plates: either a rectangular or a circular one (see the diagram above for the components of a door handle). If you have an rectangular latch plate, replace it with a round one. This will allow the latch to be able to hook onto the strike plate and make the handle more convenient.
The first step is to unscrew the screw that holds the latch plate in place. The screws can be very tight, and will require some force to loosen. It is helpful to have a second person assist with this task if you can.
After the screws have been removed, the latch plate should slide out of the door easily. If the latch plate is stuck or won't move use a small file to scrape the edges. This will sometimes free the plate.
Now you can prepare the new strike plate to be installed. Screw the latch plate into the door jamb using the screws that came with your new handles. Do not overtighten your screws as this could damage the strike plate.
If you're not sure if the latch plate is in the proper position, try closing and opening the door to check whether it latches and closes correctly. If not you'll have to adjust the strikeplate upwards or down or forward or back until the door locks correctly.
If the door is still jiggling or moving, you may need to enlarge the hole for latching in the strike plate. This is more common with older doors, but could also be caused by wear and tear, hinge mortises that are too shallow or are not sized correctly for the latch, or due to damage or a broken strike plate. If this is the situation then you should use a filing made of metal instead of a chisel, or hammer to adjust the strike plate.
Take off the Latch
The latch is the metal piece that is angled that is able to move between the hole on the inside edge of your door. The latch moves forward when you turn the handle. It also connects to a hole in the frame of the door to keep the door shut. If your door wobbles when you close it, an upgrade to the latch could be the only thing needed to fix the problem.
The screws that secure the door latch are difficult to locate, but you can usually use a screwdriver to make a small hole on the trim plate and pry the latch off. Once you've removed the trim plate, it'll be simple to remove the latch and the remaining bolts that hold the latch and spindle in place.
If the latch isn't able to release it is suggested to use an old-fashioned paper clip or tool to spring it loose from the handle mechanism. Insert the item in the recessed slot of the latch and gently twist it or jiggle until you feel the handle and latch begin to break off. It is possible to repeat this procedure several times before you are able to remove the latch.
It should be possible to slide the new latch into its slot without any issues once you have removed the old one. Use your new screws to connect the latch to the strike plate or door frame. Make sure that it is properly positioned in the slot, and aligned with the screw chambers.
Take note of the backset (the distance between the centre of the large hole on the door's front and the edge) before installing the new handle. Also, make sure that the size of the latch on the new handle is a good match to this measurement.
You'll require a new cylinder for your lock if you're replacing the handle and latch or your existing one is damaged. If you're not switching locks the new lock should fit into your existing recess, and will work with the keys you have already. Pick a latch that has rectangular cover plates to match your old handles.
Take off the cover plate
Door handles can start to look shabby with time However, if you replace them with a contemporary lever-on-rose designs, it's a quick and easy DIY project and decorating idea that can improve the overall appearance of your home. You can buy complete sets of escutcheons, privacy adaptors, escutcheons, and escutcheons.
The first step to replace an internal door handle is to remove the cover plate or rose, which hides the screws and the mechanism within. Find a release tab on the plate, and employ a flathead screwdriver pop it off the knob. It may have an opening on one edge or be secured by a pin.
Remove the screw that is holding the handle inside and put it aside after the cover plate is removed. You'll also need to remove the screws that are holding the latch and inner plates and the latch plate, which can be done by loosening them using the help of a Philips screwdriver. Take the inner plates and latch from the door. Set them aside.
Some doors don't have this gap. If yours doesn't, you'll need to drill a hole into the door to install the new handle. The process for doing this is the same as opening a door using the lock, however you'll have to be extra careful not to damage the frame or door.
Installing new door knob screws is necessary after the holes have been drilled. Make sure to buy the same size as the previous ones, to ensure that you won't have a handle that's too tight or too loose. It's also necessary to install the new strike rod and latch plate that aren't part of the majority of door handle sets.
If you're in search of a reliable replacement interior door handle set, try the Amazon's Choice FAERSI two-piece chrome finish handle set. It is a factory-fit and has received hundreds of 5-star reviews. It's a great option for replacing worn out or damaged interior door hardware on your Chevy.